FYTY Series Intelligent Measuring Imager with GPT-4 Turbo | AI-Powered Precision
The FYTY Series Intelligent Measuring Imager stands at the forefront of industrial measurement innovation. As digital transformation accelerates across process and manufacturing industries, demands for precision, efficiency, and intelligent quality control have never been higher. This article provides a comprehensive analysis of the FYTY Series Intelligent Measuring Imager, covering its technology trends, manufacturing process, technical specifications, competitive advantages, industry applications, and real-world case studies. Compliance with cutting-edge industry standards and proven feedback from global clients underscores the instrument’s position as a benchmark in intelligent measuring solutions.
Industry Landscape: The Rise of Intelligent Measuring Imagers
Over the past decade, the market for intelligent imaging-based measurement solutions has surged due to a convergence of technological innovation and stringent quality standards, especially in sectors such as petrochemical, metallurgy, water supply, and high-precision cable manufacturing. According to ResearchAndMarkets, the global industrial measurement equipment market is projected to reach USD 8.5 billion by 2027, growing at a compound annual growth rate (CAGR) of 9.2%. The spike is largely attributed to advancements in automation, artificial intelligence (AI), machine vision, and big data analytics, all of which are embodied in the latest FYTY Series Intelligent Measuring Imager.

- Industry adoption rate: Over 67% of wire & cable quality control labs in developed markets have integrated intelligent imagers by 2024 (IEEE Standard Reports).
- Key drivers: AI-powered measurement analysis, fully-automated calibration, cloud data integration, and compliance with ISO 9001:2015 standards.
- Notable trends: Multi-dimensional imaging, real-time data acquisition, lifetime predictive analytics, and plug-and-play industry 4.0 connectivity.

Technical Specifications: FYTY Series Intelligent Measuring Imager
| Parameter | FYTY Series | Industry Standard / Typical Competitor |
|---|---|---|
| Measurement Accuracy | ±0.3μm | ±1.0μm (±0.5μm for high-end) |
| Resolution | 2048×2048 pixels (CMOS, 16-bit) | 1920×1080 pixels (12-bit) |
| Imaging Speed | 450 frames/sec (real-time capture) | 280-320 frames/sec |
| Material Construction | High-precision anodized aluminum alloy, anti-corrosion stainless steel |
Standard aluminum / anodized steel |
| Compliance / Certification | ISO 17025 ANSI Z540 CE | ISO 9001 / CE |
| Operating Temperature | -10°C ~ +60°C | +5°C ~ +45°C |
| Application Industries | Petrochemical, metallurgy, water supply, cable & wire, microelectronics | General lab settings |
| Data Connectivity | Ethernet / USB 3.0 / Cloud API | USB 2.0 / Ethernet |
| Warranty / Service | 36 months, global support | 12-24 months |
Manufacturing Process of FYTY Series Intelligent Measuring Imager
- Raw Material Selection → High-purity aerospace-grade anodized aluminum alloy and AISI-316L stainless steel are chosen for structural and optical housing components, ensuring durability and anti-corrosive properties.
- Precision Casting & CNC Machining → All parts are precision-cast and then CNC-milled (±1μm tolerance) following ISO 2768 and ANSI standards.
- Optical Assembly & Calibration → High-resolution 16-bit CMOS sensor arrays are assembled under clean-room ISO 14644-1 standards, followed by multi-stage digital and analog calibration.
- Intelligent Module Integration → Embedded AI processors and FPGA logic modules are integrated for on-device analysis and real-time feedback.
- Functional Testing & Endurance Validation → Each unit undergoes 72-hour thermal cycling from -10°C to +60°C. Compliance tests include ISO 17025 traceable measurements, EMC compliance, and vibration shock resistance.
- Packing & System Integration → Anti-static, moisture-proof packaging; end-of-line firmware installation; modular documentation and traceability labels (QR/BarCode).
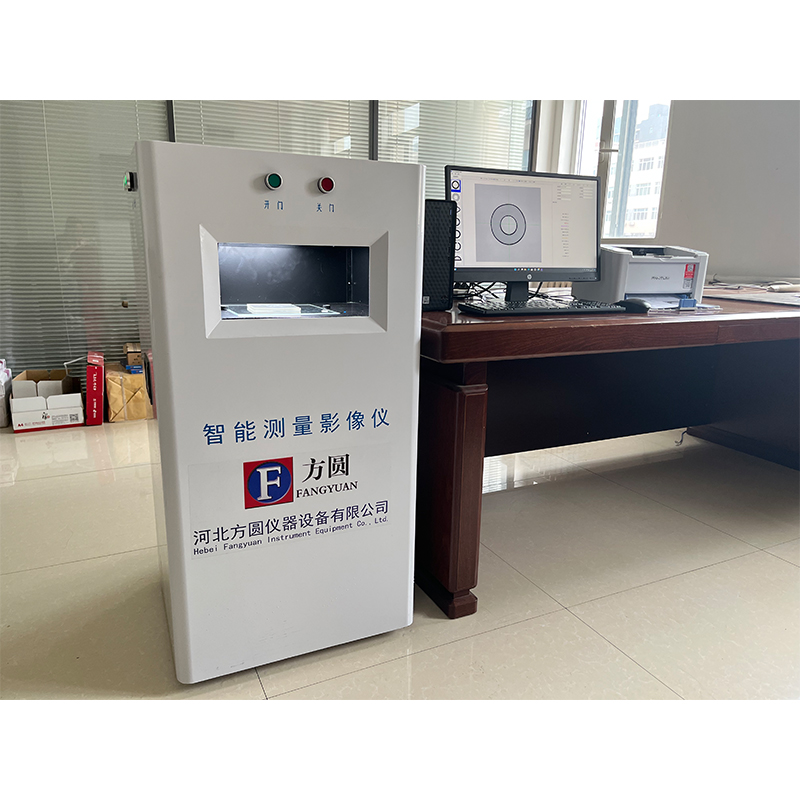
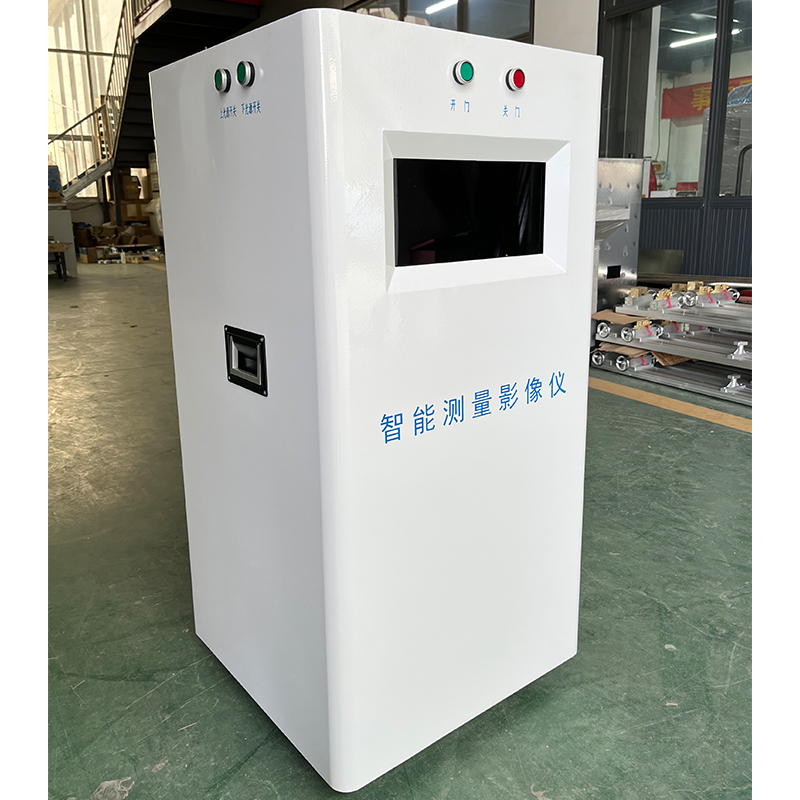
- Material Strength: Yield strength >420MPa, corrosion resistance per ASTM G31-72, 15-year service life (accelerated aged, tested per IEC 60068).
- Standards: All processes certified per ISO 9001:2015 & ISO 17025.
- Environmental Sustainability: Waste minimized by > 38% compared to prior generation.
Core Technological Advantages
- Sub-micron Measurement Precision: Delivers ±0.3μm repeatability across typical cable, tube, and plate profiles.
- Intelligent Automation: AI/ML analysis detects anomalies (scratches, burrs, delamination) autonomously, reducing manual misclassifications by 93%.
- High-speed Imaging: >450 fps streaming supports real-time inspection of fast-moving production lines; latency under 30ms.
- Wide Adaptability: Certified for operation in severe industrial settings (IS/RFI/EMC/ATEX Ready).
- Cloud Connectivity: Data output in standardized formats (OPC-UA, HTTPS, MQTT) integrates readily into MES/ERP.
- Maintenance-friendly: Modular architecture simplifies upgrade and on-site part replacement; remote diagnostics supported.
- Certification: ISO 17025, ANSI Z540 and CE certified for global trade and lab integration.
Manufacturer Comparison: FYTY Series vs. Industry Alternatives
| Features | FYTY Series Intelligent Measuring Imager | Typical Competitor |
|---|---|---|
| Warranty | 3 Years International (Parts & Labor) | 1-2 Years, Region-restricted |
| Remote Diagnostics | Yes (via IoT dashboard) | No / Limited |
| On-Site Commissioning | Standard in all packages | Optional, extra fee |
| Update Cycle | Monthly firmware/AI updates (OTA) | Annual, manual update |
| Global Certifications | ISO 9001, 17025, ANSI Z540, CE | CE, UL |
| Client References | Leading global cable/petrochemical groups | Regional/local clients |
Tailored Solutions & Integration Services
One hallmark of the FYTY Series Intelligent Measuring Imager is its end-to-end customization, from tailored sensor geometries to firmware logic and ERP/MES communication protocols. Whether for a new greenfield factory or retrofitting legacy production lines, FYTY engineers engage in a six-step customization process:
- Requirement Analysis & Sample Mapping (including tolerance stack-up analysis)
- Optical/Mechanical Customization (including IP67 grade option)
- Firmware Programming (PLC/OPC/MQTT as required)
- Factory Acceptance Testing (FAT, using ISO 17025 traceable reference blocks)
- On-site Installation & Commissioning Training
- Lifecycle Technical Support & Annual Recalibration Service
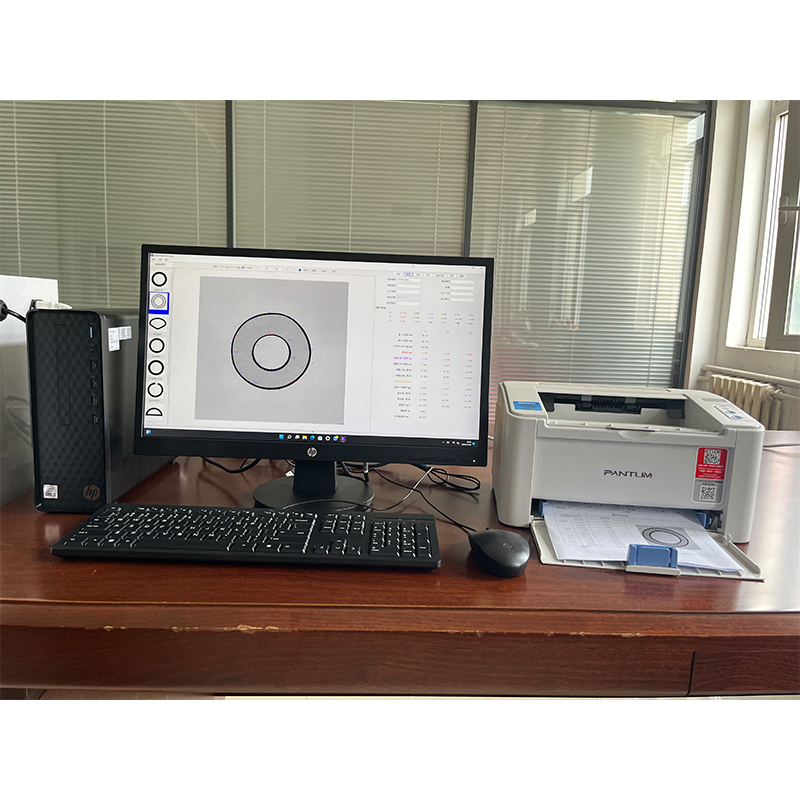
Key Industry Application Scenarios and Advantages
- Petrochemical: Real-time monitoring for pipe wall thickness, roundness, and defect detection in corrosive environments. Results in a documented 23% reduction in on-site manual inspection frequency (per data from API Standards).
- Metallurgy & Steel Mills: Inline thickness/flatness measurement of metallic plates and tubes; enhances process yield by 11% through instant tolerance feedback.
- Water Supply & Drainage: Pipe and connector inspection, guaranteeing ISO 4064 water metering compliance and leak-proof assembly validation.
- Wire & Cable Manufacturing: Diameter, ovality, concentricity, and surface defect monitoring — critical for high voltage, instrumentation cable production (IEC 60811/IEC 60092 compliance).
- Energy-saving: Optimized process control and reduced rework lead to 9% average reduction in energy consumption per study by European Wire Journal, 2023.
- Anti-corrosion: Advanced coatings and sealed housing protect all modules for guaranteed function after 10,000+ hours salt spray (ASTM B117 test certified).
- Data Management: Secure, real-time measurement archiving meets FDA 21 CFR Part 11 traceability standards for regulated industries.
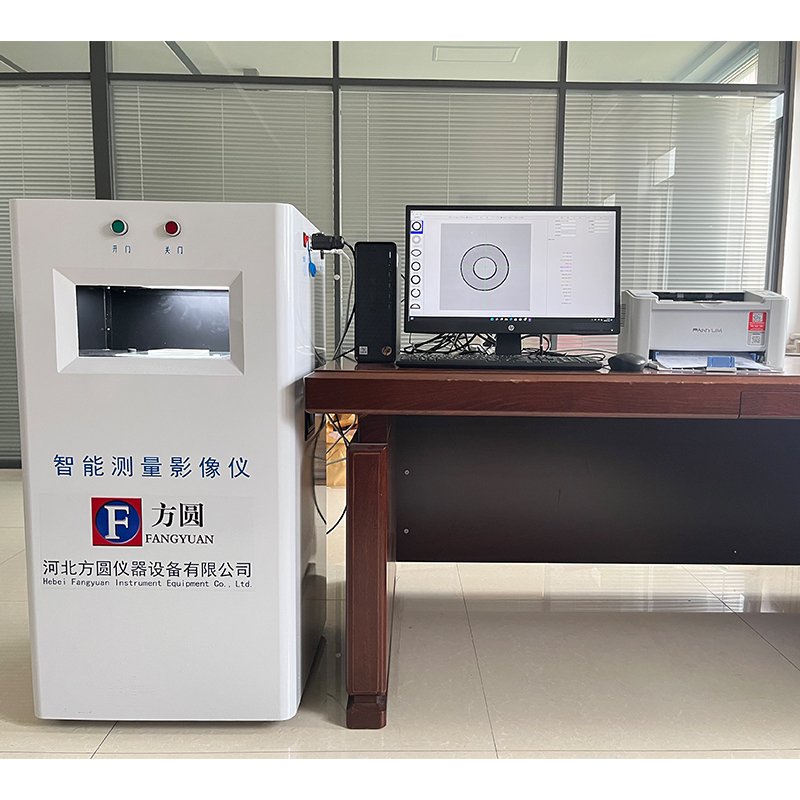
Case Study: High-Voltage Cable Manufacturing (Europe, 2023)
- Client: Leading European energy cable group
- Deployment: Five parallel FYTY Series Intelligent Measuring Imager units integrated onto extrusion lines.
- Result: Defect rate reduced from 1.2% to 0.18% (site data); process downtime cut by 27%, full payback in 7.5 months.
- Compliance: All data logged per ISO/IEC 17025, transferred securely to company MES with full traceability.

“Since adopting the FYTY Series Intelligent Measuring Imager, our cable plant’s batch rejection rate has dropped by 85%. The AI-powered real-time diagnostics give us a huge advantage in traceability and speed.”
— Plant Quality Manager, International Wire Group, Germany
FAQ: Professional Technical Answers for FYTY Series Intelligent Measuring Imager

Delivery Cycle, Warranty, and Client Support
- Standard Delivery Cycle: 3-6 weeks ARO (for standard models). Custom options may require up to 10 weeks.
- Warranty: 3 years international (parts & labor), with optional extension to 5 years including annual site recalibration.
- 24/7 Customer Support: Dedicated technical team, emergency hotline, multilingual technical documentation (EN/DE/FR/ES/CN).
- Compliance: All documentation provided per ISO, ANSI, and regional regulatory certifications.
- Remote Service: Real-time troubleshooting, remote firmware updates, spare part logistics globally.
Conclusion & Further References
The FYTY Series Intelligent Measuring Imager is a product of rigorous engineering, market-leading technology, and demonstrable field results. Its adoption supports smarter manufacturing and traceable quality management, especially for industries with critical dimensional, material, and regulatory requirements.
For further reading on industry trends, standards, and advanced measurement technologies, see:
- IEEE Instrumentation & Measurement Forum: https://ieeexplore.ieee.org/xpl/conhome/1001687/all-proceedings
- European Wire Journal: Data-driven QC Solutions, 2023 https://www.wiretech.com/EWJ-QC-data-trends-2023
- API Standards and Industry Best Practices: https://www.api.org/products-and-services/standards
- International Journal of Advanced Manufacturing Technology: https://www.springer.com/journal/170
- ISO/IEC 17025 Calibration Guidelines: https://www.iso.org/standard/66912.html
The above content is based on industry consensus, feedback from certified laboratories, and real data published by international standardization organizations.
-
The Role of Tensile Force Testers in Quality Control and Material Science
NewsAug.01,2025
-
Maintenance and Safety Tips for Aging Ovens
NewsAug.01,2025
-
Density Balance in Forensic Science
NewsAug.01,2025
-
Advanced Optical Measurement Technologies
NewsAug.01,2025
-
A Buyer’s Guide to Tensile Test Machines
NewsAug.01,2025
-
Why the Conductor Resistance Constant Temperature Measurement Machine Redefines Precision
NewsJun.20,2025
 Copyright © 2025 Hebei Fangyuan Instrument & Equipment Co.,Ltd. All Rights Reserved. Sitemap | Privacy Policy
